Mostrando entradas con la etiqueta Patron. Mostrar todas las entradas

lunes, 24 de diciembre de 2018

Gorrito Elfo

Esta noche es Noche -Buena y mañana es Navidad...

Hoy quería dejaros mi aportación para esta Navidad.
Un poco tarde lo sé, pero esto se hace en un ratito.

De hecho fue anoche cuando empecé y en un rato estaba listo. Así que todavía estas a tiempo para hacerlo.

Bueno en realidad es un gorrito de bebé, tamaño 6 meses más o menos y es rápido y sencillo


Lo he tejido con lana verde (Delfos de Valeria di roma) y la roja es una que tenia por casa sin etiqueta, ambos son grosor DK y los he tejido con crochet de 4 mm

  1. Empezamos con color verde tejiendo 69 cadenetas y a continuación engancharemos con la 4 cadeneta para empezar a tejer un punto alto en cada una de ellas. Al final tendremos una tira de 66 puntos altos (medida para mi bollito). Cerramos la vuelta con un punto raso y cambiamos de color.
  2. Rojo: Tejemos 66 puntos bajos pero solo tomando el back loop del punto de la vuelta anterior. (perdonad, pero no sé como se expresa esto en castellano, siempre lo he usado en patrones en ingles). A partir de esta vuelta siempre vamos a tejer los puntos (ya sean p.a.= puntos altos o p.b= puntos bajos ) tomando el back loop del punto anterior pero para abreviar no voy a estar escribiendolo.
  3. Verde: 66 p.a.
  4. Rojo: 66 p.a.
  5. Verde: 66 p.b.
  6. Rojo: 66 p.b.
  7. Verde: 66 p.a
  8. Rojo: 66 p.b.
  9. Verde: 66 p.a.
  10. Rojo: (9 pb, 1 dis) x 6 (60 p)
  11. Verde: 60 p.a.
  12. Rojo: 60 p.b.
  13. Verde: (8 p.a., 1 dis) x 6 (54 p)
  14. Rojo: 54 p.b.
  15. Verde: 54 p.a.
  16. Rojo: (7 p.b, 1 dis) x 6 (48 p)
  17. Verde: 48 p.a
  18. Rojo: (6 p.b., 1 dis) x 6 (42 p)
  19. Verde: (5 p.a., 1 dis) x 6 (36 p)
  20. Rojo: (4 p.b., 1 dis) x 6 (30 p)
  21. Verde: 30 p.a.
  22. Rojo: 30 p.b.
  23. Verde: 30 p.a.
  24. Rojo: (3 p.b., 1 dis) x 6 (24 p)
  25. Verde: 24 p.a
  26. Rojo: 24 p.b.
  27. Verde: 24 p.a
  28. Rojo: (2 p.b., 1 dis) x 6 (18 p)
  29. Verde: 18 p.a
  30. Rojo: 18 p.b.
  31. Verde: 18 p.a
  32. Rojo: (1 p.b., 1 dis) x 6 (12 p)
  33. Verde: 12 p.a.
  34. Rojo: 12 p.b.
  35. Verde: 12 p.a y cerramos
Ahora hacemos un pompom para rematarla punta. Y et voilá un Elfo Gorro


Perdonad por las fotos pero si me paraba para hacer fotos bonitas, no publicaba hoy. En cuanto pueda saco foto decentes y reedito.


¡Feliz Navidad!
Macy


sábado, 14 de mayo de 2016

GATO BOLA

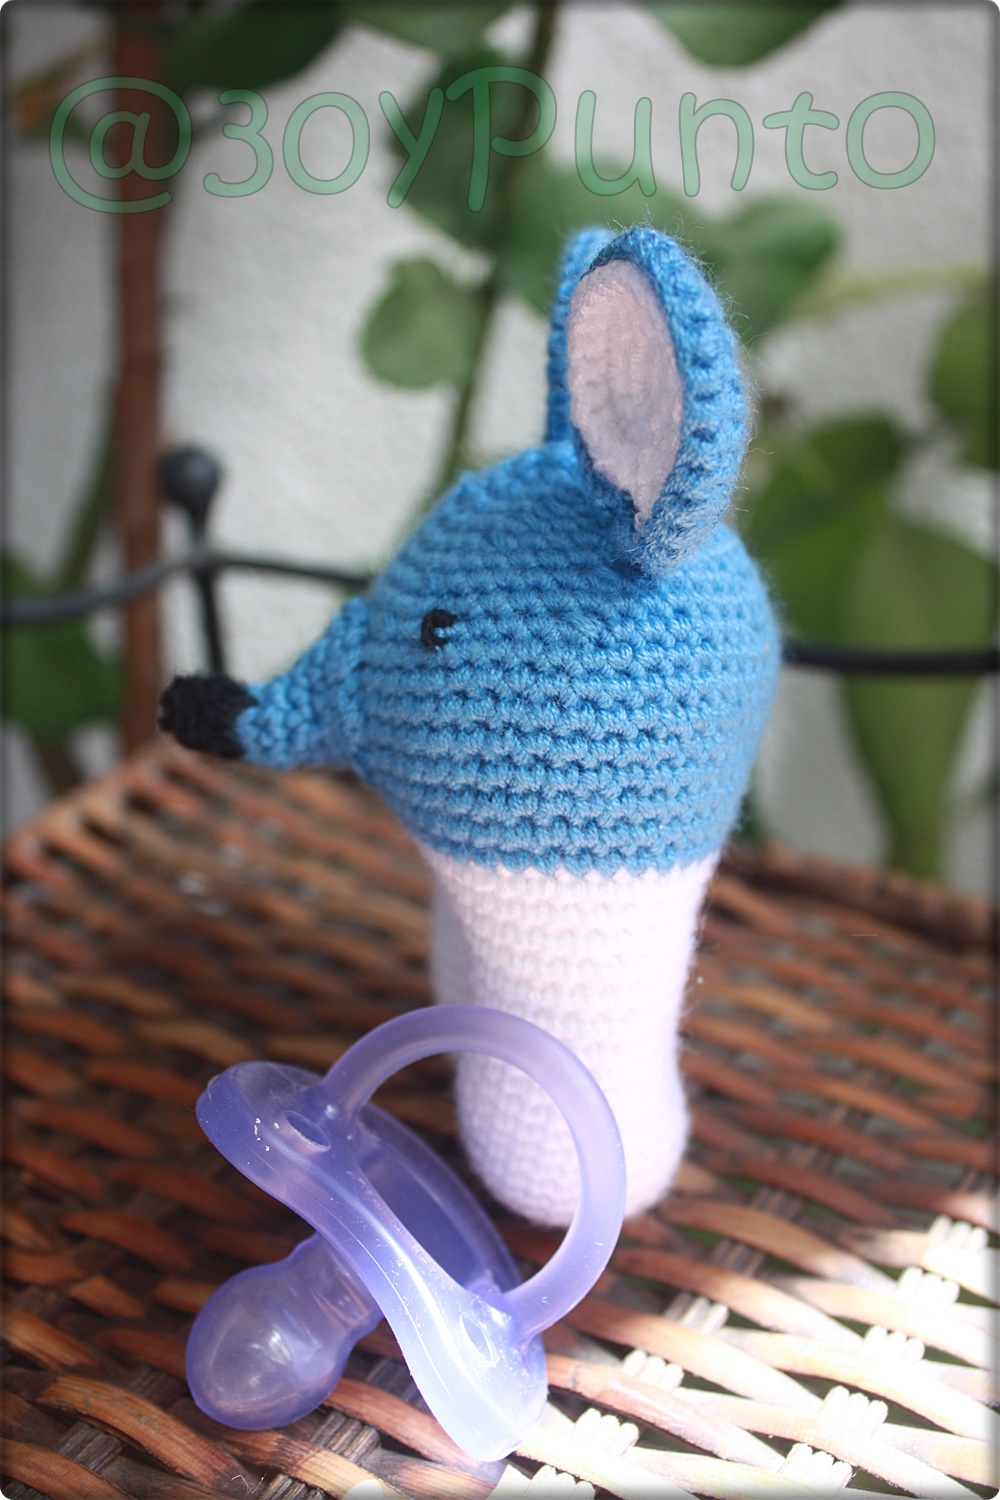
Hoy os traigo al compi del Ratoncito Sonajero:

Gato Bola


En este caso después de mucho darle vueltas opte por unos ojos de "gato chino".


Ahora me tendré que poner manos a la obra con unos para Eva, ya que le han encantado. Si os animáis, teneis el patrón en mi perfil de Ravelry, en Dawanda y en Artesanum.
Espero que os guste,
Macy

Patrón by @30ypunto
Calidad Hilo Dralón X800
Aguja 2.5 mm

sábado, 7 de mayo de 2016

Ratoncito Sonajero

Por fin ya sabemos que es niñoooooo!!!
Y como la mami quería azul para niño y rosa si era niña, no podía empezar hasta que no estuviera confirmado (yo hubiera elegido #verdequetequieroverde, que vale para todo).

Con este proyecto, os traigo el segundo amigurumi creado por mi. Al final me esta gustando esto de hacerlo a mi manera, y como no tengo que seguir ningún patrón no tengo que estar pendiente de nada (tan sólo de ir apuntándolo todo, para repetirlo en un futuro, jejeje). Lo malo, es cuando te atascas en algo por que no queda como quieres (ni os cuento la de veces que hecho esta naricita, parecía de todo menos ratón).

Pues eso, el primer gumi para mi futuro sobri: este Ratoncito


Quienes me sigáis pensareis que : que tengo con los ratoncitos, que no paro de hacerlos. Deciros que en este caso este ratón es parte de una pareja, la cual no es ratoncit@. Así que tendréis que esperar para verlos.


Como es pequeñito y fácil de agarrar, le puse un cascabel en el interior para que hiciera de sonajero. El cual estuvo testando mi peque y le encantó. Así que en cuanto acabe con lo del primo tendré que hacerlo para ella.


Espero que os guste y si os animáis podéis encontrar el patrón en Ravelry, Dawanda y Artesanum.

Un besote y hasta la próxima

Patrón: by @30ypunto
Calidad: Hilo Dralón X800
Aguja: 2.5 mm

domingo, 3 de abril de 2016

Toquilla Flamenca para Bebé

Hoy os traigo una entrada muy flamenca.

Esta toquilla para la primera Feria de Abril de mi peque.

Para las fotos he usado uno de mis trajes de fondo, ya que el de la peque aun no está terminado.


Para el año que viene probaré alguno para mí, ya para este año no llego, jajaja.
Por cierto el patrón podéis encontrarlo aquí, aquí o en mi cuenta ravelry.

Besos
Macy

jueves, 23 de enero de 2014

Chaleco con Flecos

Buenas,
Hacía tiempo que no escribía pero entre los encargos de navidad y mi último proyecto tricot, he estado muy liada. Pero ... por fin lo terminé. Os presento: Mi primer proyecto tricot 2013-2014

CHALECO CON FLECOS


Me ha llevado casi un mes, y muchos giros de trenzas, pero ya lo tengo listo para estrenar. Podéis encontrar el patrón en ravelry para quien quiera intentarlo. Por ahora os dejo más fotos.


Espero que os guste. Por que a mí me ha encantado.
Macy

Estoy enlazando este post a la fiesta de enlaces del blog Personalización de Blogs

lunes, 14 de octubre de 2013

Alfombra XXL

Llegó mi 2º proyecto de trapillo: dos alfombras para el dormitorio.
Cojí esta combinación de colores por que del trapillo que tenía en casa era los que más me gustaban, y al final quedó perfecto.


Aquí os dejo el patrón que utilice:
En la foto del esquema tenéis de la vuelta 1 a la 5, y el resto son repeticiones. Más abajo indico como venia el patrón. Creo recordad que sólo llegué a la vuelta 9. Quien se atreva a llegar más lejos que comparta fotos.
Mi próximo proyecto XXL: un cesto para calcetines. A ver cuando saco tiempo e ideas
Macy


·                     Vuelta 6: Igual que la vuelta anterior.
·                     Vuelta 7: Igual que la vuelta 3, las veces necesarias hasta acabar la vuelta.
·                     Vuelta 8: Igual que la vuelta 4, las veces necesarias hasta acabar la vuelta.
·                     Vuelta 9: Igual que la vuelta 2, las veces necesarias hasta acabar la vuelta.
·                     Vuelta 10: Cambio de color.Igual que la vuelta 3, las veces necesarias hasta acabar la vuelta.
·                     Vuelta 11: Hacer PR hasta el sig. espacio de PC. 3 PC , 1 PA en el mismo PC. ( 1 PC , 2 PA en el mismo PC del siguiente espacio)* 63 veces. Acabar con 1 PC.Unir al inicio de la vuelta con un PR.
·                     Vuelta 12: Igual que la vuelta anterior.
·                     Vuelta 13: Cambio de color .1 PC. 1 PB en cada uno de los puntos de la vuelta anterior. 

·                     Vuelta 14 y 15: Cambio de color.1 PC. 1 PB en cada uno de los puntos de la vuelta anterior. Cerrar.


P.D: Estoy enlazando con Fiesta de Enlaces #91 Link Party

miércoles, 9 de octubre de 2013

Tutorial Pelo de Muñecos

 Aquí os dejo el tutorial de como hacer el pelo a muñecos, el cual utilicé para hacer el pelo a la Muñeca de Paula, espero (aunque esté en inglés) que os sirva como me sirvió a mí.Os dejo el enlace original del tutoria, para que veais más fotos.
Macy


Amigurumi hair tutorial 

Head:
To make the hair for an amigurumi, have the head already made. I like to work with 5's since for me they're a lot easier to increase and decrease mathematically. For this example I'll use a head size with the diameter being 50 sts in the largest round. The head will be increased by 5 to be 50 sts at it's widest, so rounds 1 - 10 will increase from 5 to 10 to 15 to 20.... up until you reach 50 in round 10. Make rounds 11 - 20 50 sts in each round, and then began decreasing rounds 21 - 27 by 5 sts each round so that it goes 45 to 40 to 35 to 30...until you get to 15 sts in round 27. (Of course all this is just for explanatory purposes only, and you can make the heads whatever size you'd like, I'm just including head dimensions so that it'll be easier to understand the hair instructions.) At this point I usually fasten off the end and leave around 12 inches of yarn to sew the head to the body at a later point.
Hair:
Round 1- Make and adjustable ring and sc 5 sts- 5 sts.
Round 2- 2 sc in each st- 10 sts.
Round 3- [sc 1, 2 sc in next st] 5 times- 15 sts.
Round 4- [sc 2, 2 sc in next st] 5 times- 20 sts.
Round 5- [sc 3, 2 sc in next st] 5 times- 25 sts.
Round 6- [sc 4, 2 sc in next st] 5 times- 30 sts.
Round 7- [sc 5, 2 sc in next st] 5 times- 35 sts.
Round 8- [sc 6, 2 sc in next st] 5 times- 40 sts.
Round 9- [sc 7, 2 sc in next st] 5 times- 45 sts.
Round 10- [sc 3, 2 sc in next st] 5 times- 50 sts.
Rounds 11-17- sc in each st around- 50 sts, fasten off and leave a longish tail for sewing the hair to the head.
For me, this size wig cap is sufficient for this size head, especially since I like to have a little more room to shape the hairline by embroidering the hair to resemble someone's actual hairline with bangs, or sideburns, etc.
Now is where it begins to get more creative. Determine where you'd like to place the hair, usually it helps to experiment with eye placement at the same time. I don't fasten the craft eyes to the head until I've seen both where the hair is going to be and I'm comfy with how the eyes give the doll an expression. Once you've made that decision it's time to sew the hair to the head.
(Just a quick aside- since there are different ways to make amigurumi hair you can also cut lengths of yarn in the hair color and knot it to the wig cap in a methodically spaced manner and then pull the hair up through the wig cap so that the knots are on the inside of it and then sew it to the head and be done with it. This isn't how I typically do the hair for my amigurumi and I don't have images illustrating this way in this tutorial, maybe I'll make another one at a later date.)
Using the aforementioned tail, as well as a yarn needle, sew the perimeter of the wig cap to the head. This is really the only place that I attach the wig cap the the head, it's proven sturdy enough and there's no need to make this more time consuming than necessary. Sometimes when you're embroidering the hair onto the wig cap you'll catch part of the head underneath the wig cap with the needle, its no big deal and if you're worried about the wig cap coming off of the head, this'll be an additional method of security. You can use the remaining yarn on your needle to start embroidering the hair, or else just weave it into the head/wig cap to get to the next part.
Another tip is that after you've pulled a length of yarn to use to embroider the hair, pull the yarn so that the needle is at the halfway point of the length of yarn. You'll use the same amount of yarn to make the hair, but it'll be thicker and faster when you double the yarn on the needle.
Since the head isn't attached yet to the body when you start a new strand or double strand of yarn, you can tie a knot to keep it from coming loose and then pull the needle up through the head. Or you can just do what most embroiderers do and not knot it with the intention of it being secured eventually by just going over the yarn with your stitches. I tend not to secure it, partly because it's an additional step, and partly because I have a 3 year old and 1 year old who both play and pull and I've never had any issues with hair coming loose. Though, as I've said before, it really is all up to you and your comfort level, if you're making it for someone younger or who you think will pick and pull at it, then by all means knot away!
Boy hair:
Whether you're making a boy or a girl will determine whether you'll want to part the hair, or where you want to part it. With masculine hair I tend to keep it shorter and just have a small side part, I also begin by embroidering the back of the head with short stitches, working my way up the head so that it looks like the hair/yarn at the top of the head is laying on top of the hair lower down the head. I do this across the back of the head. Then as I begin to get higher I take a break doing that and move to the top of the head where I've decided upon the part. Here, I start using longer stitches, and make the hair part evident by embroidering up and down the head with the yarn always going along the same line up at the top of the head indicating a hair part. I think what I'm talking about now will be better illustrated by the images. Once you've filled in the hair as much as you like, you can add embellishments like little bangs or sideburns by just embroidering a bit more in the front, and that way it also covers up the edges of the wig cap as well.
Girl hair:
For the girlish hair styles discussed in this tutorial I keep it close to the head with either a ponytail or pigtails or braids. For a ponytail you just embroider the hair in the direction of where you want the hair around the head to gather to be tied. Do this back and forth until you're happy with the results and weave in the end of your yarn. Now cut yarn in the desired length so that when it's doubled it'll be long enough to resemble two strands of hair pulled back in a ponytail. Do this with as many lengths of yarn that you need to have a thick enough ponytail for your liking. Using the yarn lengths that you've cut, string them through the hairline and then you can either knot them or leave them as they are, and then gather them into the ponytail. Fasten by either using a rubber band, or just a scrap piece of yarn to tie the hair back.

For pigtails/braids it's pretty much the same idea, except you'll be embroidering the hair back and forth across the head to where either ear would be. When you're cutting the lengths of yarn to finish it up, you still need to double the yarn to ensure that you have long enough lengths for the pigtails, and even a bit longer for the braids since they tend to shrink up the yarn with their bulk.